
A brief history of 2/18 Infantry Battalion AIF
When the 2nd Australian Imperial Force (2nd AIF) was raised in 1939 following the outbreak of World War II, a decision was made to number the divisions by following on chronologically from the five divisions that formed the 1st AIF in the Great War.
The WWII divisions were numbered 6-9. However, it was also decided that the numbering of the individual units that formed the new divisions would start from 1. In order to avoid confusion with WW I units with the same numbering, the numeral 2 (signifying the 2nd AIF) was placed before the unit number. WWII’s 18 Infantry Battalion therefore became 2/18 Infantry Battalion.
If a unit, such as an anti-tank regiment, did not exist in WW I, the numeral 2 was not used for the new WW II unit.
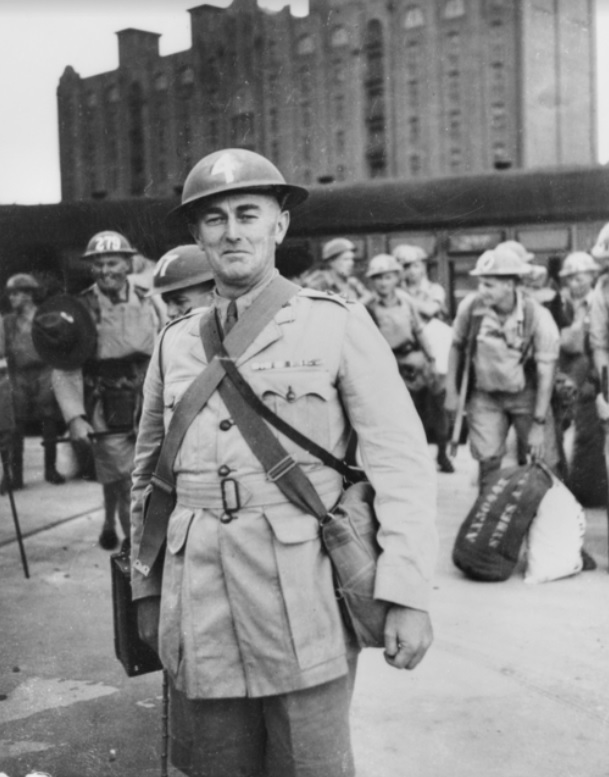
The 2/18 Infantry Battalion was formed in June 1940, under the leadership of Lieutenant Colonel Arthur Varley, a grazier from Inverell, NSW, and previously commanding officer of 35 Militia (Army Reserve) Battalion. It was composed almost entirely of volunteers from Sydney and rural NSW, many of them from the area where Varley lived. Country recruits accounted for about 60% of the 900-strong unit, which comprised four rifle companies (A, B, C and D) and a headquarters company augmented by various support and administrative troops.
The unit’s colour patch was a diamond shape, split in half horizontally, the purple over green reflecting the new battalion’s affiliation with the Great War’s 18 Battalion. The diamond was set on a grey-coloured oval, designating that the battalion was part of 8 Australian Division.
Along with 2/19 and 2/20 Battalions, the 2/18th formed the 22 Infantry Brigade of the 8 Division. With a strength of about 20,000, 8 Division consisted of three infantry Brigades (22, 23 and 27), supplemented by artillery, anti-tank, machine-gun and engineering units, as well as signals, transport and other logistical support units.
On 13 July 1940, battalion headquarters were established at Wallgrove Camp on Sydney’s western fringe. Basic training, which began on 1 August, was conducted by experienced regular soldiers as well as those who had served between the wars in the militia. On 16 August, the battalion moved to Ingleburn, to the south west of the city, and on 5 October took part in a divisional march through the streets of Sydney. In November there was a further move to Bathurst, where there was open countryside suitable for large-scale brigade and divisional exercises, in the expectation of deployment in the deserts of the Middle East.
However, although hostilities at that time were confined to the European and Middle Eastern theatres, by late 1940 there were growing concerns about the possibility of war with expansionist Japan. With the British colonies of Malaya and Singapore rich in rubber and tin and vulnerable to attack, and British resources stretched to the limit, the British government petitioned the Australian government to send troops to the region. In October, the Australian government committed its 22 Brigade and supporting units to garrison duties in Malaya.
However, as the brigade was earmarked for service in the Middle East, where 8 Division was to join the 6, 7 and 9 Divisions, the posting was to be of short duration. The British government promised to replace the Australians with an Indian division in May.
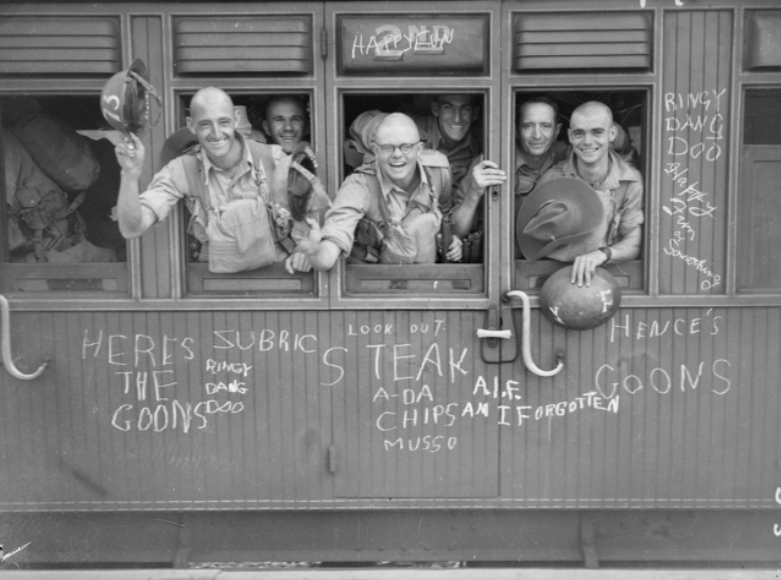
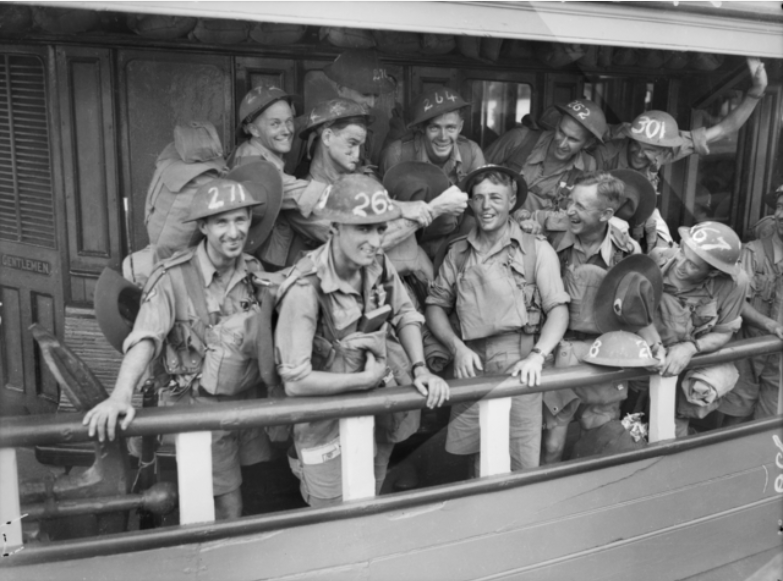
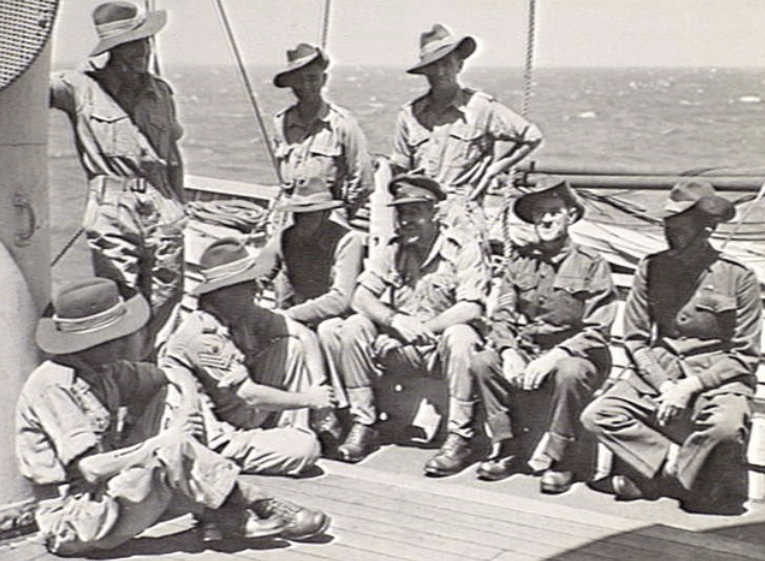
After completing training at Bathurst, 22 Brigade entrained for Sydney where veterans, who had served with 18 Battalion in WW I, lined up to wish them well. On 4 February 1941, the 793 men of 2/18 Battalion set sail on the former Cunard liner, Queen Mary, now painted battle-ship grey and designated as ‘HQXT’. However a few days later, when the ship was in the Indian Ocean, the troops discovered that their destination was not North Africa, but Singapore.
The brigade had been trained and outfitted for desert warfare. Consequently, on arrival at the Naval Base in Singapore on 18 February, the brigade boarded trains for various destinations in Malaya, to continue their training, this time in tropical conditions. The 2/18th was posted to the picturesque town of Port Dickson, on Malaya’s south-western coast, and were soon undertaking route marches and exercises in open rubber plantations and in thick, almost impenetrable jungle.
In March the battalion, reinforced with new arrivals, moved inland a short distance to Seremban. The men, unused to tropical heat and the rigors of jungle training, were falling prey to skin diseases, along with malaria, measles and mumps. Some troops were so ill that they were repatriated home and, by the end of March, the battalion’s strength was well below its war establishment.
Active service in Malaya
With war with Japan looking increasingly likely, the plan to send the Australians to the Middle East was cancelled and, in mid-1941, 22 Brigade was joined by 27 Brigade, bringing the number of infantry battalions to six.
The 2/18th remained in Seremban until mid-August, when troops were ordered to take up battle stations on the east coast of Johor state, an area considered to be a likely place for invasion, as it offered the most direct route to Singapore. Initially the men were accommodated in tents among rubber plantations at Jemaluang, but on 6 September moved further north to the seaside town of Mersing, where they pitched their tents at Palm Beach and began work fortifying the coastline, with beach defenses and an extensive minefield that stretched almost 800 metres out to sea.
On 6 December the battalion was placed on a war footing. Two days later, in the early hours of 8 December, Japanese forces stormed ashore at Kota Bharu in north-eastern Malaya, where they soon overran the defenders. Once they obtained a foothold they quickly moved south.
The Japanese had to cover a considerable distance before they engaged the Australians in combat, but on 27 December a small group from the 2/18th, along with other Australian troops that had been detached to Rose Force to operate behind enemy lines near Ipoh, successfully ambushed a Japanese convoy of five vehicles near Trong. However, it was not until 3 January 1942 that the battalion had its first sight of the enemy, with the capture of two Japanese airmen, shot down near the mouth of the Sekakap River, south of Jemaluang.
As the Japanese advanced down the excellent roads built by the British colonial administration, key positions fell like ninepins. By the third week of January the invaders had covered hundreds of kilometres and were engaging Australian forces occupying defensive positions that ran in a line from Mersing in the east to Muar in the west.
As Japanese forces advanced down the west coast, defenders in the east were in danger of being outflanked and cut off. The 2/18th and 2/20th, which had come under air and land bombardment at Mersing and had been eagerly anticipating going into action against the Japanese 55 Regiment, which was advancing overland along the coast, received orders to withdraw to Jemaluang, 10 miles (16km) away. After blowing up the Mersing Bridge, the 2/20th withdrew through the 2/18th to take up new positions near Jemaluang.
After taking Mersing, the enemy moved south. In order to check their advance, 2/18 Battalion, supported by two artillery batteries from 2/10 Field Regiment, prepared an ambush between the Nithsdale and Joo Lye Rubber Estates, just north of Jemaluang.
D Company, deployed as lookouts, was stationed to the north of the ambush zone, on the western side of the Mersing-Jemaluang road, while B Company was positioned further to the south on the opposite side of the road. Further to the south was A Company, with C Company placed in reserve, to the rear.
The surprise attack was planned to take place in daylight, but the Japanese advance was much slower than anticipated, and it was well after nightfall when they entered the ambush zone.
The Australians allowed the large Japanese force to pass through the D and B Company positions. At around 3am they reached the infantrymen of A Company, who sprang the trap, assisted by artillery and mortar fire and inflicting heavy casualties. However, as D Company turned south to attack the Japanese from the rear, they were cut off by an enemy force that had managed to infiltrate the ambush site and were now dug in on a small hill, on the eastern side of the road.
Although B Company valiantly attempted to provide support for D Company, Varley, the battalion’s C O, planned to launch a counterattack with A Company. At 8am, brigade headquarters ordered the battalion to withdraw through the 2/20th positions at Jemaluang. With C Company providing covering fire, A Company and some members of B Company managed to break off contact with the Japanese, leaving D Company, and the remainder of B Company, to fight their way back to the battalion lines. The 2/18th lost 77 men killed, and another 13 or so were wounded. The Japanese death toll is unknown, but it is believed to be considerable, as the losses sustained slowed the enemy advance by two days.
Following the withdrawal, the battalion retreated along the Jemaluang-Kota Tinggi Road, and then to Johor Bahru and the causeway linking Malaya with Singapore. There was no contact with the enemy during this movement, but there was constant patrolling, and troops were deployed as a rear guard.
The 2/18th now had a temporary change in leadership, when Major William Fraser took over from Varley, who was placed in command of Eastforce (22 Brigade and several Indian and Malayan units), following Brigadier Harold Taylor’s detachment to organise the withdrawal across the causeway. Once on the island, Varley assumed command of the battalion once more. After receiving 90 reinforcements to replace those lost at Nithsdale, the 2/18th, now consisting of 37 officers and 826 other ranks, took up defensive positions along a three-mile (4.8 km) stretch of the Straits of Johor on the north-west coast of Singapore Island.
In action on Singapore Island
The entire area allotted to 22 Brigade consisted of tidal mud flats and mangrove swamps, home to salt-water crocodiles and intersected by a myriad of rivers and small streams. With mangroves limiting the view of the strait and thick jungle greatly restricting the field of fire the Australians, who were spread thinly along the line of defence, faced an impossible task. To the horror of the battalion, which had constructed heavy defence works along the coastline near Mersing, there was not a strand of barbed wire to be seen, much less any beach obstacles or fixed defences – Malaya Command was afraid of alarming the local population.

between the advancing Japanese forces and members of the 2/18th.
The brigade’s position stretched from the Kranji River in the north, to Ama Keng village, near Tengah airfield, in the south – a distance of 9 miles (14.4 kilometres) – which meant that defending troops were spaced roughly 100 metres apart. On the 2/18th’s right flank was 2/20 Battalion, which had suffered only a few casualties before withdrawing from Mersing. The 2/19th, heavily reinforced with largely untrained troops after very heavy losses sustained in desperate fighting at Bakri and Parit Sulong, was by far the weakest of the three battalions and was on the left.
Hidden in the mangroves on the Malayan side of the causeway were 16 Japanese battalions, from 5 and 18 Divisions, many of them experienced and battle-hardened troops. After a softening up period of heavy artillery and aerial bombardment on the brigade’s positions throughout 8 February, at around 10.30pm the Japanese began a waterborne assault across the Straits of Johor against the Australian positions. The battalion’s A and C Companies, occupying the most forward positions in their sector, resisted strongly, inflicting heavy casualties against the invaders, but it was a lost cause.
Exploiting the gaps in the battalion’s perimeter, by 1.30am on the morning of 9 February the enemy penetrated the line and moved towards battalion HQ, threatening to cut off the 2/18th’s line of retreat. The forward companies were ordered to withdraw and fall back on battalion headquarters. Heavy fighting ensued, much of it hand-to-hand, with the defenders sustaining heavy losses and many becoming disoriented and lost in the dark, before the survivors were able to regroup near Ama Keng.
The battalion fell back on Tengah airfield but, at 1pm, with only 330 men, withdrew further to brigade HQ, now located near Bulim village. With the assistance of patrols, who engaged in several minor clashes with the enemy, the position was held throughout the night, but at 6am orders were received to fall back to Keat Hong village on Choa Chu Kang Road, to act as brigade reserve. The withdrawal was covered by the carrier platoon and, despite heavy shelling from enemy artillery, the vastly depleted battalion ambushed two company-sized Japanese columns, with the unit’s Vickers machine gunners inflicting heavy casualties.
The Brigade then retreated to the Reformatory Road area (now Clementi Road), where the 2/18th was positioned between the junction of Ulu Pandan and Bukit Timah Roads. During a counter-attack the next day, the battalion was held in reserve, along Bukit Panjang Road. A company-sized group, however, was detached to join a scratch unit of 200 men from various units in the brigade. Dubbed X Battalion, it was to carry out a counter attack the following day, 11 February. However, after moving into the target area, the men were ambushed as they slept. Troops not bayoneted in their sleep were overwhelmed and, despite fierce hand-to-hand fighting, there were few survivors. The next day, 20 who were captured were lined up along a monsoon drain on Jurong Road and used for bayonet and sword practice.
Four, who miraculously survived the slaughter, were all from the 2/18th. The same evening that X Battalion came to grief, the remainder of the battalion occupied a position north of ‘feature 127’, but moved further south to obtain better fields of fire early on the morning of 11 February. Shortly afterwards, they were attacked simultaneously from the front and rear by enemy troops who had managed to infiltrate the position and were forced to retreat. Later that day, when brigade HQ came under attack at Wai Soon Gardens from Japanese troops moving south from Bukit Timah, battalion members engaged in a bayonet counter-attack across Reformatory Road. At the same time, a section from the battalion’s carrier platoon, firing machine guns and hurling grenades, moved towards Bukit Timah Road, repelling the Japanese advance.
However, the rout continued and a further retreat saw the brigade relocate to the junction of Holland and Ulu Padan Roads where, although subjected to heavy fire, at around 9am the battalion took up a new position. However, in the confusion, some men were separated from the main body and cut off.
That afternoon, after the brigade’s position was reoriented towards the west, the battalion was placed in reserve, to the north. On the night of 11 February, the battalion, situated on the high ground, came under heavy attack from Japanese aircraft and artillery, as the brigade—supported by Australian and British artillery—fought off two regiments of the Japanese 18 Division.
Early the next day, Varley was promoted to brigadier and given command of the brigade when Taylor became ill. Major Charles O’Brien, the battalion’s second-in-command, took over from Varley. A lull in the fighting did not last, broken when the Japanese 18 Division attacked the brigade on its left flank.
Late that afternoon, as a counter-move, about 60 men from the battalion, supported by three British armoured cars and artillery, were dispatched to take to high ground south east of Ulu Pandan and Reformatory Roads.
However, the light was fading, and the attack failed. Yielding to heavy enemy pressure, the brigade was forced into retreat once more, falling back to the junction of Buona Vista and Holland Roads. The 2/18th’s strength had by this time been reduced to 250 men.
On 13 February, with the Japanese closing in, Allied troops were ordered to form a 25-mile (40-kilometre) perimeter around Singapore city. The 2/13 Australian General Hospital at St Patrick’s College at Katong, which fell outside the area, were instructed, to surrender to Japanese forces advancing from the east when the time came. Any patient sufficiently able-bodied was given permission to attempt an escape.
No one inside the hospital was harmed when it was captured, but four members of the AIF guarding the gate were decapitated by advancing enemy troops, and another badly wounded. The following day the Japanese overran the Alexandra Military Hospital in Singapore, massacring an estimated 300 patients and medical staff.
The Australian troops, tasked with defending the final perimeter’s north-east sector, occupied 7 miles (11km) of the line. Centred on Holland and Farrar Roads, this zone included Tanglin Barracks, the Australian home base, about 2 miles (3.2km) west of the city.
The 2/18th’s position on Cemetery Hill was exposed, with gravestones providing the only cover. However, the Japanese skirted the Australian sector and, passing through gaps in the British, Indian and Malay lines, advanced towards the city.
With the Australian perimeter completely by-passed and in danger of isolation, General Gordon Bennett, the Australian commander, prepared to make a last stand. However, such action was not necessary. With ammunition and food in short supply and the water pumping station in enemy hands, there was no hope of mounting a counter-attack. With a million civilian refugees from Malaya cluttering the city, the Allied commanders agreed that there was no option but to surrender. At 8.30pm on 15 February, the 2/18 Battalion, along with tens of thousands of Allied troops, became prisoners of the Japanese.
Although an order had been issued for all troops to lay down arms and make no attempt to escape, a small number of men from the 2/18th, along with other members of the battalion cut off early in the fighting, managed to reach the west coast of Sumatra. After boarding evacuation vessels at Emmahaven, 24 reached Ceylon. They returned to Australia, where a number were transferred to other units and saw active service in New Guinea. Others who attempted to flee Singapore died in the attempt or were captured.
In Japanese hands
In Singapore, following the surrender, the Japanese took away eight men from the battalion’s carrier platoon, which had inflicted heavy casualties on the enemy. They were executed on 19 February.
On 17 February, the surviving members of the 2/18th were sent on a long and circuitous march of humiliation from Tanglin Barracks to the vast military establishment at Changi, 15 miles (24km) to the east. On arrival they, along with 15,000 other Australians, were incarcerated in Selarang Barracks, the pre-war home of the Gordon Highlanders.

outside the Officers’ Quarters at Changi Gaol
The Japanese wasted no time in putting their unexpected labour force to work. Thousands of prisoners, including members of the 2/18th, were sent to Burma and Thailand to construct a railway, others to Sandakan in British North Borneo to build an airstrip and to Japan to work in factories and mines.
However, a substantial number remained in Singapore, where conditions were much better than those found in overseas camps. Some 165 battalion members stayed in the main Changi Camp, but 264 were sent to Blakang Mati Island (the Island of the Dead, now known as Sentosa) where they were housed in brand new colonial barracks. There were only 12 deaths in Changi and 3 at Blakang Mati – malaria, a fractured skull, and accidental drowning.
Members of the battalion unfortunate enough to be sent on overseas working parties suffered dreadfully. Of the 1,793 Australians, including 173 from the 2/18th, who were incarcerated at Sandakan, there were just 6 alive at war’s end. One, Private Nelson Short, was from the 2/18th. The remaining prisoners perished at the main camp or on 260km marches into the jungle-covered interior. All 10 officers from the battalion, transferred from Sandakan to Kuching Camp in 1943, survived the war.
Brigadier Varley did not. In May 1942 he and 132 members of the 2/18th were sent with A Force to Burma where Varley, the senior Allied officer, was responsible not only for A Force but for the welfare of more than 9,000 POWs working on the railway. After moving down the line to Thailand, he returned to Singapore but, in September 1944, was sent to Formosa (now Taiwan) on a prison transport ship, Rakuyu Maru, which was torpedoed by the American submarine, USS Sealion. Most of the 1,250 POWs on board, who were bound for Japan, abandoned ship safely. Varley took charge of several lifeboats.
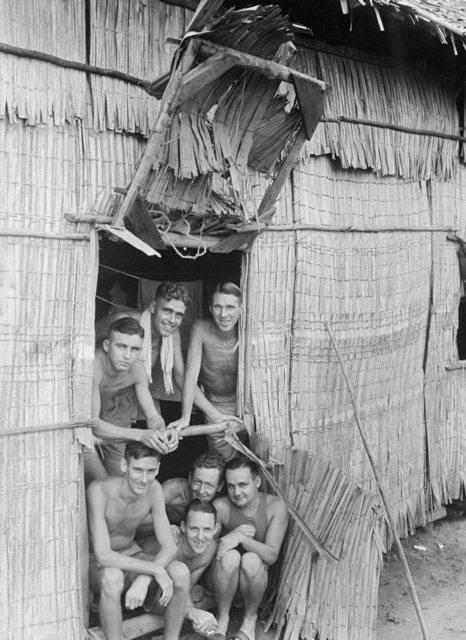
2/18 Battalion who were prisoners of war look out of an opening in the
wall of their hut at Changi Gaol.
Neither he nor his companions were ever seen again, and it is believed that all were machine-gunned by enemy naval vessels. A total of 12 battalion members were lost as a result of the sinking. Of the 269 officers and men from the 2/18th who were sent to work on the Burma-Thai railway, 52 died.
A number of Australians attempted to escape from POW camps. Almost all came to grief, either in the attempt or by execution after being recaptured. The battalion’s Lieutenant Charles Wagner was one of a group of eight men who successfully escaped. Aided by a local underground organisation, they escaped in boats from Berhala Island, at the entrance of Sandakan Harbour, in June 1943, while awaiting transfer to the main camp. On reaching Tawi Tawi in the Philippines, they joined the American-backed liberation army. Wagner and one other escapee were killed while fighting with guerrilla forces.
The 2/18th had created strong bonds during training and in battle – bonds that sustained them through the long years of imprisonment. Many demonstrated inventiveness and initiative that aided their survival and helped maintain morale.
A total of 1,381 officers and men had embarked on overseas service. Of these, 248 (including Wagner) were killed in action and four captured in battle were executed. Another 269 died in captivity, 8 were executed after the surrender and another was executed for trying to escape.
Post-war
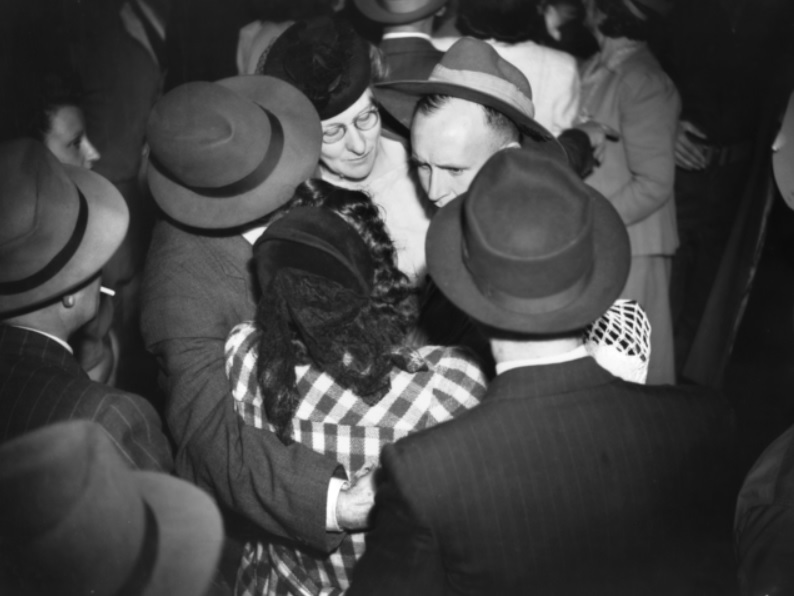
Following Japan’s unconditional surrender on 15 August 1945, the surviving members of the battalion were repatriated to Australia over the next two or three months from Singapore, Thailand, Japan, Sumatra and Borneo. Many of them formed a strong Association, whose members continued to enjoy the camaraderie of the wartime years until 2018, when the passage of time took its toll. However, friends and relatives of the men continue to keep the spirit alive.
Battle honours and awards
The 2/18 Battalion was awarded the following battle honours:
Malaya 1941-1942, Johore, Jemaluang and Singapore Island.
Awards for gallantry to individual members were:
Military Cross
Lieutenant Jack Vernon
Military Medal
Private Eric Beresford
Distinguished Conduct Medal
Private Colin Spence
Sergeant Charles Wagner
Member of the Order of the British Empire
Sergeant Gerry Alldis
Captain Arthur Hence
Mentioned in Dispatches
Sergeant J.P. Adam
Corporal J.A. Baird
Private James Barton
Sergeant Tom Browning
Warrant Officer L.O. Cheal
Major W.E. Fraser
Warrant Officer A.D. Freeman
Lance Corporal Paul Gemmell (*)
Private Clarrie Lowe (*)
Private N.R. Marshall
Lieutenant Ian McDonald (*)
Captain G.J. McLoughlin
Major C.B. O’Brien
Private Ginty Pearson (*)
Warrant Officer Jock Stewart
Brigadier Arthur Varley
Lieutenant C. Wagner
Sergeant J.R. Walton
Corporal R. Williams (*)
(*) Recommended
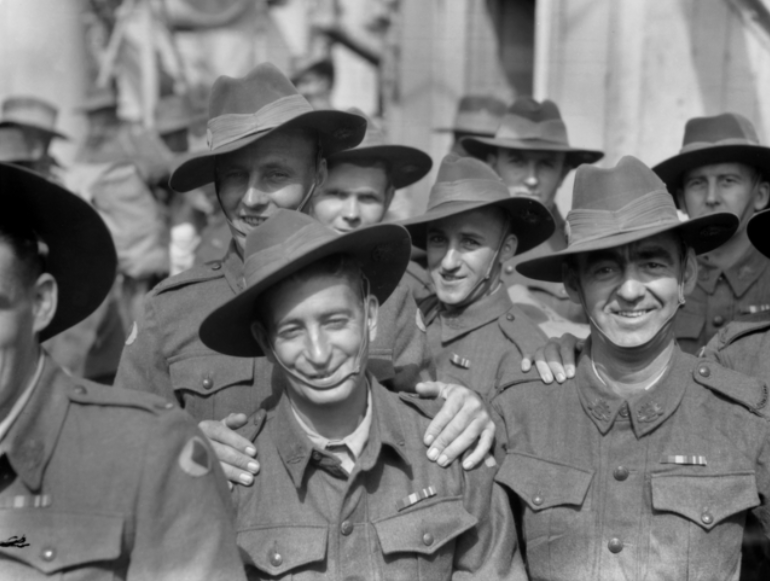
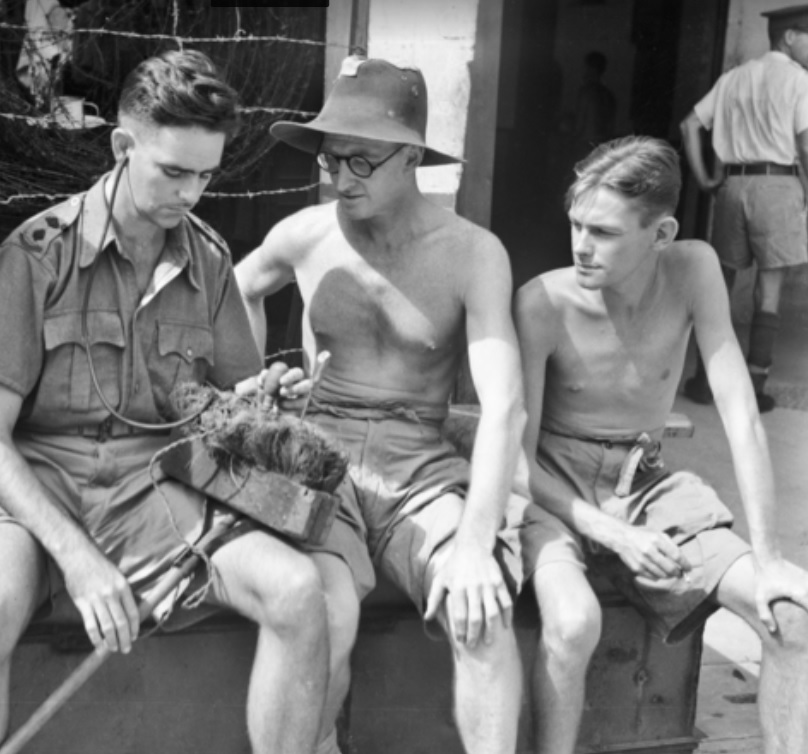
Pte Vic Evans (extreme right, rear).
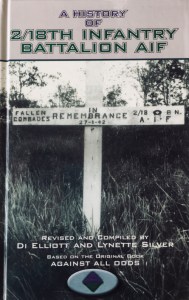
For more information on the 2/18 Battalion’s history and detailed lists of
personnel, including a full Nominal Roll, Honour Roll and POW Rolls for each
camp, refer to the book A History of 2/18th Infantry Battalion AIF, revised
and compiled by Di Elliott and Lynette Silver, 2006. To obtain a copy of this book email:
secretary@218battalion.org.au
© All material on this page is subject to international copyright and can’t be reproduced without the express permission of Lynette Silver.
